
Drum filter troubleshooting. Clarity starts here.
Drum filter troubleshooting guide: why a drum keeps rinsing, will not rinse, will not turn, leaks, overflows or leaves the water cloudy, with a step by step fix order and a maintenance routine.
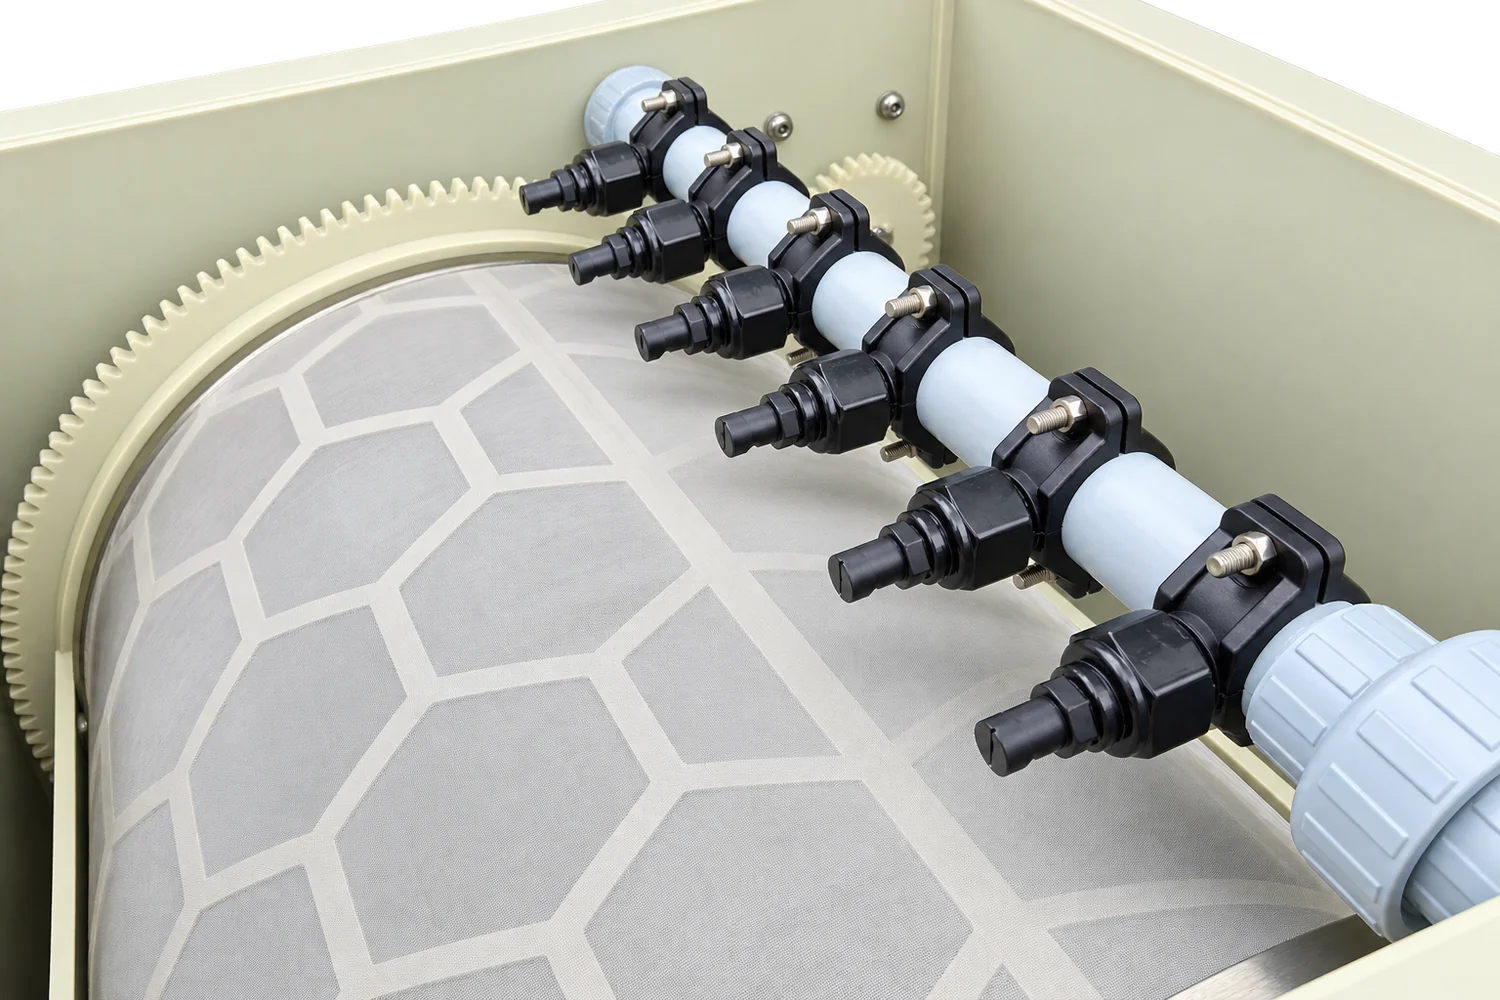 EQUIPMENT REFERENCE
See the mechanism.
Understand the duty.
Select a route or a stage to inspect the process. The cutaway explains the equipment and water environment; it is a teaching illustration, not a project drawing.
Capture solids
Use actual flow, screen opening and solids duty.
Particles are retained as water crosses the screen. Dissolved contaminants require other treatment stages.
- Use actual flow, screen opening and solids duty.
- Confirm approved levels, wash supply and waste drainage.
- Observe a complete guarded cycle before changing settings.
What is your filter
telling you?
Select a symptom, choose your installation type, then answer the first diagnostic question. Use the full guide for the detailed checks.
Maintain oxygen and follow the emergency circulation plan. Isolate supplies and release wash-line pressure before reaching into equipment.
Does one complete wash leave the screen clean?
Pump-fed: inspect a dirty-side rise and the downstream outlet route. Use your commissioned operating levels.
The fault library.
Focused guides with possible causes, observable checks and the next action. Expand a guide or search for a component.
01Continuous rinsing
The wash repeats, but normal operation does not return.
Continuous rinsing
The wash repeats, but normal operation does not return.Use the checks below with the approved commissioning settings for your installation. Isolate before inspection or maintenance; observe powered tests only from a safe position with guards secured.
02No automatic rinse
The screen loads, but the cleaning cycle does not start.
No automatic rinse
The screen loads, but the cleaning cycle does not start.Use the checks below with the approved commissioning settings for your installation. Isolate before inspection or maintenance; observe powered tests only from a safe position with guards secured.
03Weak or uneven spray
The drum washes, but dirty stripes remain.
Weak or uneven spray
The drum washes, but dirty stripes remain.Use the checks below with the approved commissioning settings for your installation. Isolate before inspection or maintenance; observe powered tests only from a safe position with guards secured.
04Screen fouling
Grease, biofilm or mineral deposits restrict the mesh.
Screen fouling
Grease, biofilm or mineral deposits restrict the mesh.Use the checks below with the approved commissioning settings for your installation. Isolate before inspection or maintenance; observe powered tests only from a safe position with guards secured.
Configuration varies by model.
05Overflow or level drop
The dirty side rises, or the clean side loses water.
Overflow or level drop
The dirty side rises, or the clean side loses water.Use the checks below with the approved commissioning settings for your installation. Isolate before inspection or maintenance; observe powered tests only from a safe position with guards secured.
06Drum not turning
The wash runs, but the drum remains stationary.
Drum not turning
The wash runs, but the drum remains stationary.Use the checks below with the approved commissioning settings for your installation. Isolate before inspection or maintenance; observe powered tests only from a safe position with guards secured.
07Unusual noise
A new rattle, scrape, hum or grinding sound.
Unusual noise
A new rattle, scrape, hum or grinding sound.Use the checks below with the approved commissioning settings for your installation. Isolate before inspection or maintenance; observe powered tests only from a safe position with guards secured.
08Water leaks
Water appears at joints, seals or the housing.
Water leaks
Water appears at joints, seals or the housing.Use the checks below with the approved commissioning settings for your installation. Isolate before inspection or maintenance; observe powered tests only from a safe position with guards secured.
09Cloudy or green water
Particles, algae or biological conditions need investigation.
Cloudy or green water
Particles, algae or biological conditions need investigation.Use the checks below with the approved commissioning settings for your installation. Isolate before inspection or maintenance; observe powered tests only from a safe position with guards secured.
No matching guide. Try “pump”, “screen”, “sensor” or clear the search.
Before changing the mesh: check actual flow and solids loading. Catalogue maximum flow is a comparison value, not a guaranteed operating duty at every mesh and load. Review drum filter sizing ↗
Seven places.
One connected process.
A fault in one part can appear as a symptom somewhere else. Select an inspection point to see its role and what to observe.
Inspect for deposits, tears, loose edges and damaged support after isolation. Persistent haze alone does not prove that the panel is worn.
The drawing is a process concept. Component positions, flow routes, level sensing and protection logic depend on your model and installation.
Simplified concept, not to scale. Confirm actual component locations from the supplied drawing.
Capture
Mesh retains suspended particles as water passes through.
Detect
The configured level signal or timed control requests cleaning.
Rotate & wash
The drive moves the screen while the wash system clears retained solids.
Remove waste
The gutter takes retained solids and wash water to the waste route.
Recover
Check that the wash ends and approved operating levels return.
A routine you
can work through.
Use this checklist during an operating review. The exact frequency and service procedure follow your manual, loading and site conditions.
Checks stay only in this page session. Use the service record at your site for permanent maintenance evidence.
Observe each operating dayAdjust to site loading
Inspect during planned serviceIsolate before hands-on work
Review before high-load periodsFeeding, rain and seasonal debris
Arrange the periodic serviceUse manufacturer instructions
Prevent an automatic restart.
Secure all relevant supplies, including separately fed pumps or UV equipment. Release trapped wash pressure. A controller OFF button may not isolate mains power.
Know when to call service.
Smoke, burning smells, electrical moisture, exposed wiring, a stalled drive or repeated tripping require isolation and qualified diagnosis. Never bypass a protective interlock.
Plan the outage.
Maintain oxygen and the approved emergency circulation arrangement. A bypass may only be used if the installation and downstream process were designed for it.
Know your actual
backwash water use.
A changing wash rate is useful evidence. Measure several complete cycles, record a daily cycle count, and calculate the water used at your installation.
Use a wash-water supply meter where available. Total waste discharge may include process water as well as wash water, so record the measurement point.
Clean, service
or replace?
Order by model, serial number and part revision. Appearance alone does not establish compatibility.
Screen panel
- Observe
- Deposits without structural damage
- Check first
- Use the approved cleaning procedure. Review permeability after cleaning.
- Service decision
- Tears, damaged support or loose mounting require replacement assessment.
Nozzles & spray bar
- Observe
- Uneven fan, blocked tip or leak
- Check first
- Clean without changing the orifice; confirm bar alignment.
- Service decision
- Replace worn or cracked components with the matching specification.
Sensor & mounting
- Observe
- Erratic signal or fouled sensing surface
- Check first
- Clean, check mounting and have the input signal tested.
- Service decision
- Confirm failure before replacing the sensor or controller.
Wash pump
- Observe
- Poor spray, air ingress, noise or tripping
- Check first
- Review supply, suction and strainer before condemning the pump.
- Service decision
- Arrange service for persistent loss of performance or electrical faults.
Drive, bearings & seals
- Observe
- Rubbing, play, leakage or abnormal noise
- Check first
- Use only specified adjustment and lubrication procedures.
- Service decision
- Do not force the drum; have damaged drive parts assessed.
Electrical & UV equipment
- Observe
- Moisture, damage, trip or burning smell
- Check first
- Keep the affected equipment isolated and record the fault.
- Service decision
- Qualified service must establish a safe repair and restart.
Keep a record of the date, symptom, operating levels, flow, wash frequency and work completed. Check repairs through a full operating and wash cycle before returning to unattended use.
The questions
operators ask.
Short answers for the next decision. Use the detailed fault guides and your model instructions for the actual service procedure.
Ask PureflowWhy does my drum filter keep rinsing?
Check whether one complete wash clears the screen and restores the operating level. If it does not, inspect the nozzles, wash-water supply, drum movement and deposits. If it does, review solids loading, actual flow, outlet restrictions and the sensor signal before changing mesh or settings.
How often should a drum filter rinse?
There is no universal interval. Compare the wash frequency with your commissioned baseline at similar flow and feeding. A sustained increase or a cycle that fails to restore levels needs investigation.
Why is my drum filter not rinsing?
Record the external controller indication. If the model has a manual wash control, test it only with guards secured and hands clear. A successful manual cycle directs attention to the automatic sensor and control input; no response requires supply and controller diagnosis by qualified service personnel.
Why is my drum filter overflowing?
In a pump-fed layout, check screen permeability, effective washing, actual inlet flow and downstream outlet restrictions. In a gravity-fed layout, check for clean-side drawdown and restricted gravity supply. Also inspect waste drainage if the wash gutter backs up.
How do I clean a drum filter panel?
Isolate power and wash pressure, separate the cleaning route from stock and biological filtration, and follow the approved screen procedure. Use a soft brush and compatible rinse water. Obtain approval for any chemical, concentration and contact time; rinse completely before returning to service.
How long does a drum filter panel last?
There is no verified fixed replacement interval for every Pureflow installation. Inspect for tears, damaged support, loose attachment and persistent blockage after approved cleaning. Confirm the correct replacement panel using the model and serial number.
How much water does a drum filter use for rinsing?
Measure the wash-water volume over several complete cycles and divide by the number of cycles. Multiply litres per cycle by the recorded daily cycle count to estimate litres per day. Total waste-drain discharge may also include process water, so identify the measurement point. No universal Pureflow litres-per-cycle value is claimed here.
Should I switch off my drum filter in winter?
Follow the operating plan for the stocked system. Where freezing is possible, protect the wash supply, pump and waste drain. A planned shutdown must include an alternative oxygen and water-treatment plan, plus draining and storage steps specified for the equipment.
Can I run the drum filter while I fix a fault?
Do not work on moving or pressurised equipment while it is energised. Maintain stock protection using the approved standby or emergency arrangement. Use a bypass only if the installation was designed for it and downstream treatment can accept the resulting water quality.
When should I call for help?
Call immediately for repeated trips, electrical moisture, smoke, burning smells, a stalled drive or uncontrolled water loss. Also seek support when cleaning and hydraulic checks do not resolve the fault. Supply the model, serial number, alarm, water levels and a safe video.
How do I know if my drum filter needs a new screen?
Visible tears, loose edges or damaged supports justify inspection for replacement. Persistent fouling may require a cleaning review, while haze can have biological or particle-size causes. Hazy water alone does not prove that the screen is worn.
Give us the evidence.
We’ll help with
the next step.
A useful service brief is more valuable than a guessed replacement part. Prepare the details below and share them with Pureflow.
- Model, serial number and controller alarm text.
- Installation type, actual flow and operating water levels.
- What changed before the fault and what you have checked.
- A short video from a safe position, with guards secured.
Call +91 98444 11881
WhatsApp +91 98455 91881
Prepare a service brief.
Build a text summary on this page. Nothing is sent automatically; copy it and choose what to share.